Sunday, April 17, 2011

HAiR CHRONiCLES: Protective Styling #1

So as you all know, I am on a RELAXED journey.  And for those that follow me on Hairlista, you know that I'm trying my hardest to rock MY hair in low manipulation/protective styles (no weaves, wigs, etc- for now! lol).  So I went out and bought some orange flexi-rods to do a loose wave style.  It was an epic FAiL!!! lol.  I only used 10 rods...

(topview from back)

I am nine weeks post-relaxer and I did it on 100% air-dried hair so my ends were a little poofy.  The next time I try the flexi-rod set, I will blow dry my hair so that my ends are straighter or do it a few weeks post-relaxer.  Anywho, I put a little hump in the front and pulled it up into a messy pony...


(I thought the results were cute...just can't wait til I get more length!)

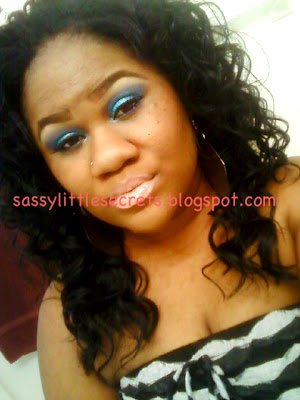
This is a cute summer style.  I would rock this with big dangly earrings, halter tops, tank tops, etc.  I liked that it showed off my facial features and I liked to show off my makeup with this look:


Tuesday, April 12, 2011

RAVING REVIEW: Wet N Wild Shine Nail Polish (Blazed)

Hey Lovies!!! Ok so as you all know, I am a college student so that means I ALWAYS shop on a college budget lol.   Anywho, I was on the hunt to find some cheap-y (but good quality) nail polish to build up my polish collection.  Although I don't do my nails myself, the nail salon sometimes doesn't have the exact colors I want so this would be a way to ensure that I have the color of my choice.  Because it's officially SPRING, I wanted to find fun, brighter colors.  Among the few polishes I picked up was the Wet N Wild Shine Polish in Blazed (which is a orange-peachy color):

(image courtesy of Google images)

Overall, I would say the product worked efficiently for the $0.99 that I paid.  Can't really get cheaper than that lol.  It did deliver a glossy shine and the color was very pretty against my skin tone.  However, I will recommend you do three coats to get the true color.  But then again, I do have acrylics so maybe it'll be different on bare/natural nails.  The polish lasts awhile (I've been wearing mine for three weeks now) but remember I do have acrylic nails so it may not last as long on natural nails.  Just make sure you use a good topcoat :)

Here's what mine looked like:


Sunday, April 10, 2011

LOOK BOOK: Neutral Envy

So I went to Walgreens a couple weeks ago (and of course I ended up in the beauty aisle lol).  I was looking for something new to add to my collection and to try something new with my eyes (because I've been purchasing lippies more frequently).  I noticed that Jordana had colored eyeliner and decided to purchase one that I thought would look great on my eyes.  The one I purchased was in Seagreen and I decided to do it with a neutral eye to add a bit of spice to it.  Here are a couple pics of the look:

(Sorry my camera is horrible! It looks black here, but the top does it better justice lol)

In order to achieve this look, you will need browns (indicated below) that are closer to your skin tone (or whichever gives you that neutral look) and a green eyeliner (of your choice)--mascara and/or falsies are optional!
  1.  Prime your lids with whatever primer you choose. This will ensure that your shadow lasts longer with minimal/no creasing.
  2. Apply a base to your lids.  Because i was working with browns, to get color payoff, I used Jordana dark brown liner and blended it out.
  3. Using my Profusion 36 Glamour Eye Palette, I used the 2 shimmery browns above (the arrows indicate which were used).  Using a shader brush, I used the bottom brown and patted it on all over my lid.
  4. Using a crease brush, I applied the top brown and applied it to my crease, making sure I blend it out.
  5. Take whatever brow highlight you want and apply to your brow bone (make sure u blend down into your crease.
  6. (Optional) Re-apply shadow to the lid for more definition and retouching.
    7.  Apply black eyeliner along the top lash-line. I used Maybelline Eyestudio Gel Liner in Black. Line your            waterline using the green liner.  Again, I used the Jordana Retractable Eyeliner in Seagreen.
    8.  Apply mascara and/or lashes and your look is complete! (I used Maybelline Falsies Volume Express  Mascara in Black and Ardell False Lashes #134)           


Here's my final look :
(Once again, my camera is terrible!! It didn't pick up the green at all!! I should be gettin a new one soon)                                                                                                                                       

Monday, March 28, 2011

MY {RELAXED} HAIR JOURNEY: Thus Far....

Hey Lovies!! Ok, I'm here to tell you a little more about me (well my hair).  I am on a hair journey and am hoping to get to bra strap length (BSL) by my birthday (Sept 12).

Well maybe I should start from the beginning.  I was natural up until middle school.  It took me a while to get my hair to completely take the relaxer, but when it finally did, I took really good care of it.  Then I was introduced to weaves, wigs and drawstring ponytails and it was downhill from there.  I never wanted to wear my real hair (even though I always had a good grade of hair).  It just got really boring for me.  I enjoyed the versatility of weaves and I was IN LOVE!!   In 8th grade, I had to get a haircut because there was a patch in the back of my head due to hair breakage.  I liked the chic little bob cut but I wanted my length back.  Soon I started self-relaxing but I didn't know too much about hair.  I just used some hair products that my sister had (because at the time she had long hair).  Eventually my hair started growing again.

Now I'm  sophomore in college and a good friend of mine introduced me to the concept of the "hair journey."  It definitely piqued my interest after I saw all of the lovely ladies on hairlista.com that were on this journey and had healthy long relaxed hair!  I felt if they could do it, then I could as well.  When I first began my hair journey, my hair looked like this:
(As you can see, my hair was severely damaged! Embarassing!!)

Eventually, I got my friend to trim up my hair so I can begin my hair journey with freshly trimmed ends.  Here's where I began:
(My hair was a little past shoulder length but not quite armpit length. Me and my sis coined it "sharmpit length" lol)

But this was all back in September 2010.  Presently, my hair is getting closer and closer to my goal of bra-strap length.  I flat-ironed my hair a couple days ago and this was the result:
(Yes, im still working on those thin areas at the tips but i dusted my ends and I'll probably do a little trim with my next relaxer)

Well, that's pretty much my hair journey at this present moment.  I'm pretty satisfied with my results.  If you have more questions, feel free to hit me up.  For more pics, list of my products and to keep track of my progress, check out my profile on http://www.hairlista.com/profile/ToyaNixon

Monday, March 21, 2011

Raving Review: OPI Shatter Nail Polish

There have been many reviews and tutorials on YouTube concerning the OPI Shatter nail polish.  I thought it looked pretty cool so I most definitely had to try it!!! And I must say, I LOVED IT!!!  In case you don't know what the bottle looks like here's an image:


(image courtesy of Google Images)

This nail polish has been seen on celebrities, from Katy Perry to Fergie.  It goes on regular but as it dries, it begins to crackle.  It leaves a cute little pattern on your fingernails and is really simple to do (especially if your not really artsy and can't do designs).  Here's how my nails turned out:


I got my nails done at a nail shop (the are acrylics with tips).  They painted my nails pink and added a glitter polish on top and then proceeded to apply the Shatter polish.  The Shatter polish was provided by them but the pink underneath was purchased by me from my local Walgreens.  It's by Sinful Colors and it's called "Pink Forever".  It only cost me $1.99 (excluding tax), which is very cheap compared to Essie, Sally Hansen, and China Glaze. And because I'm a college student, I don't have the extra cash to splurge on the more pricey items so this def did the trick.  I do find that it's very comparable to China Glaze and lasted me a good 3 weeks (with NO topcoat).  Sinful Colors also has other pretty colors that I'm gonna go back and purchase, so i do recommend this brand.

Overall, I liked the look!!! It was very bold and because I'm trying new things for 2011, it made a HUGE statement (I mean, people ADORED my nails and who doesn't like compliments? lol)!!  If you're looking to have a more edgier look, OPI Shatter polish is recommended as an addition to your polish collection.

Friday, March 11, 2011

LOOK BOOK: Smoky Brown Eye

So this past weekend, I went out with dear friend of mine.  Earlier that day, I was browsing Youtube (which has become a daily ritual for me) and  came across a brown smoky eye that I was dying to try.  Here's what I came up with...


This look was quite simple.  All you need is a brown eyeshadow base (I used Jordana Eyeliner Pencil in dark brown), a dark brown eyeshadow (I used CoverGirl Eye Enhancers in Swiss Chocolate and a shimmery brown in my Profusion 36 Glamour Eye Palette), a white eyeliner...mascara and eyeliner are strongly encouraged.

  1. Using a dark brown eyeshadow base, apply all over the lid and a little above the crease.
  2. Using a light shimmery brown shadow, apply all over the lid (using preferably a shader brush).
  3. Using a darker brown eyeshadow, apply to the crease (using a fluffy crease brush).
  4. BE SURE TO BLEND THE SHADOWS SO THERE ARE NO HARSH LINES!
  5. Apply a brow highlight.  Be sure to blend down into the crease
  6. Take your white eyeliner (I'm using Wet N Wild Color icon pencil in White) and apply to your water-line.
  7. Optional: Apply the brown shadow underneath the water-line for an added dramatic/smoky effect.
  8. Apply liner, mascara and/or falsies, maybe blush, and a fabulous pink lip!
Now, you're ready for a night on the town!! Knock 'em dead Lovies!!


Thursday, February 24, 2011

Aqua Marine Makeup Look

Today I was bored and decided to play in my makeup (which is always fun).  I wanted to use my pretty blue colors (which I rarely use).  Here are some of the basic products I used to achieve my aqua marine look:
1. Wet N Wild Eye Shadow in Lagoon (254B)
2.  Nicka K HD Eye Shadow in 3006 (the turquoise color)
3.  Jordana Eye Liner Pencil in Turquoise
4.  Wet N Wild Lipstick in 901B (which is a light pink color)

After priming the eye, apply the Jordana eyeliner all over the lid to act as a base for the eyeshadow to stick  (blend out a little above the crease).  Using a turquoise eyeshadow, apply all over lid.  Then take the dark blue eyeshadow (Lagoon) and apply to the outer "V" of your eye and the crease.  Apply a highlight (I used a white color), eye liner, mascara and/or lashes and voila, you have your Aqua Marine Look!!!  It's that simple.


Here's Mine


Tuesday, February 22, 2011

RE-CAP: Bad Girls Club 6

(photo courtesy of Google Images)

**The following post is reflective of MY thoughts! This being said, there is a lot of profanity used.  If you have issues with the use of profanity, I suggest you refrain from reading this post!**

OMG I don't know where to begin!! I was gonna wait until later to post this but it just couldn't wait!  If I don't know anything else, I do know that I CAN'T STAND CHAR!!!!  I know that sounds harsh but I'm just keepin it real.  She is A PUNK ASS B***H and she really not as mature as she think she is!!  She use people to do her dirty work and assume that she top notch b***h but I think it's all a front.  I believe that deep down she lonely and she always hating on the other girls because they're just now beginning to start their lives and she realize that hers is damn near over.  Why else would a woman of her stature sign up to be on a show with 21year olds?  She damn near 30 years old, no kids and no man!  She ain't got no type of game.  I mean, come on, when have ya'll seen her pick up a dude in the club??.............. I'M WAITING...!!  She always so busy focusing on what the other girls are doing!  When they're in the club, what is Char always doing...watching the other girls!!! Can you say LAME?!?  Now I will admit  I didn't always hate her but as the show progressed she got really annoying! She came in the house trying to be "mama" and I knew that s**t wasn't gone fly!  And I was rolling when Lauren punched the s**t out of her. LMMFAO!!!  If you so tough sweetie, why you started crying? Straight BITCHASSNESS...NEXT!!!

So the ugly ass new girl (Jen) is there now!! She really does look like an Oompa Loompa but i think with a mixture of Leatherface with all them wrinkles around her eyes!  Lmao!!! Tone it down with the self tanner boo, it ain't that serious!  She was already annoying and yes she is a follower! She was only going with the flow of everybody of the house! And Playboy sweetie?? I THINK NOT!!  No ass at all, hideous face and you was a scary lil b***h too cuz if you really wanted to hit Nikki, you had ample enough time to do it!! Smdh...

All the rest of the girls in the house really don't deserve any honorable mention because they don't do much!! Cori, Ashley...and what's the other girl name that be up Char ass? The Sicilian/Italian one? *Crickets*  EXACTLY!  They really don't think on their own..I'm really team Nikki and Lauren because they actually standing up for themselves (especially Lauren, that's my dawg lol)...she really know how to get under Char skin lol TOO FUNNY!  Oh and I think Char need to get fired from her corporate job because her behavior wasn't really representative of a top notch executive!! I know I wouldn't want her representing my company.  And I noticed on the after show that she couldn't really look Lauren in the face, she looked down most of the time (tsk tsk bitchassness).  Oh and I just wanna know who deemed her "chief executive b***h"?  Boo, don't give yourself titles!! #notcool "PLAY WITH IT GOOFY A** B***H!!!"

HAHA Since when has "goofy" become an insult?  Come better next time...

Sunday, February 20, 2011

MAKE-UP 101: Flawless Face For Beginners

Makeup is intended to enhance your beauty and, in some cases, hide your imperfections.  But when overly done it can make even the prettiest women look, um, "drag(queen)-ish."
case and point: Meagan Good (image from Google Images).

However, with the proper tips and much practice, you can achieve a flawless face that complements your skin tone and features.

  1. Choose a primer that's great for smooth application.  L'oreal Studio Secrets Anti-Dull Primer is a good one but I personally use Phillip's Milk of Magnesia or Wet N Wild Shade Adjusting Foundation+Primer.  Primer is important for long-lasting wear, minimal creasing/shine, and minimal transference. Apply this all over your face (it's ok to use your clean fingers), including the eyelids and underneath the eye.
(I mostly use the Intuitive Blend for my lids but it can be used all over the face).

   2.  Choose a concealer!  This may be optional if you don't have anything to conceal.  However, concealer is        perfect for camouflaging dark under-eye circles and other imperfections (i.e. acne scars).  Pick a shade that's 1-2 shades lighter than your actual skin tone. I use Maybelline's Dream Smooth Mousse in 350 Caramel (yes it's a foundation but it works wonderfully as a concealer personally).  Apply this,using a concealer brush (or your fingers), to your dark spots and underneath the eye, making sure you BLEND IT OUT!
 (the smaller brush is for under eye and the larger brush is for the full face).

3.  Choose a foundation that matches your skin tone!  This is important so that your foundation doesn't look like a mask on your face (or if too light, you could look like Casper).  If you're using drugstore makeup, most times there are swatches so that you can test the makeup but if you're not sure, you can always go to a professional and get a color-matching.  I use Maybelline's Dream Matte Mousse in Cocoa 3 (it goes on phenomenally with your fingers).  Apply the foundation all over your face using a face brush (i.e. a stippling brush) or your fingers (make sure that they are CLEAN). Smooth out for a more natural look (blending is always key!!). [OPTIONAL: Apply some of the foundation to your neck area as well so that your face and neck are the same shade.  I choose to skip this step because my neck and face are the same color so my makeup blends well].

4.  Choose a matching skin powder to set your foundation.  This is essential for minimal transference of make-up as well as providing a matte finish.  I use Milani Even-tone Powder Foundation in Creamy Cocoa.  Using a face brush, apply it evenly all over your face.

(I use the face brush for the powder foundation.  I apply the Dream Smoothe Mousse with my fingers).


       5.  Once you've completed these steps, you should pretty much have a FLAWLESS FACE!!  Make sure you BLEND, BLEND, BLEND!!!  This is essential in assuring that your makeup has a natural look!  For a little more definition, you can apply bronzer and/or blush.


My Flawless Face


Friday, February 18, 2011

Welcome ALL!!

OMG! So I'm soooo excited to begin my journey as a blogger!  It's something that I've always wanted to do but I've never had the time to begin.  However, my school workload has let up and I've become better at makeup, hair, etc so I thought: why not share tips I've learned??  Surely it would benefit someone else as much as it has benefited me.

My blog will be aimed at all things girlie--gossip, makeup, hair care, skin care, you name it!!  I believe in feeling good and looking even better!  Yes, TRUE beauty is skin deep but let's face it: we live in a superficial world!! How others perceive us is very important in this dog-eat-dog world.  So why not make the most of it? Let us embrace our womanhood because confidence is the first essential to looking great.

I am in no way a beauty guru!  I actually consider myself a beginner so this will be a learning process for the both of us.  Mostly everything I showcase will be budget-friendly (because I'm a college student duh!) but with the proper technique/application, it can look just as good as the higher-end stuff!

This being said, let's begin shall we?